Well, it is finally here, Advanced Predictions in EPM Planning. The August 2025 update to EPM includes this new capability and I took some time to play around with it. Bringing this multivariate functionality directly into EPM predictions should significantly improve forecasting data. Up until now, EPM used univariate predictions, meaning that only one variable was used to predict future data. Multivariate allows us to use that main variable plus one or more related drivers. Another way to think about it is that univariate would predict next month’s revenue using only the past revenue values. But multivariate uses past revenue and drivers like units sold and average sales price to predict the future data. Prior to Advanced Predictions, this capability was only available by using external ML models and importing it into EPM.
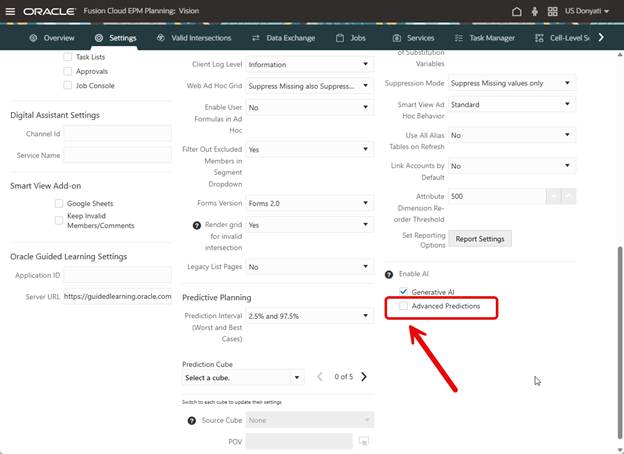
Before we can do anything, it must be enabled. This is opt-in functionality, EPM and legacy prediction functionality works fine without it, so if your company is not ready to embrace AI, that is ok. To enable, go to Settings and check the box.
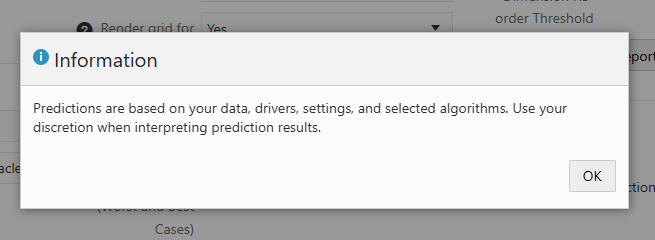
When you check the box, you get an informational message about using discretion when interpreting prediction results. This is good advice, I agree that results need to have a human review and should not be blindly accepted.
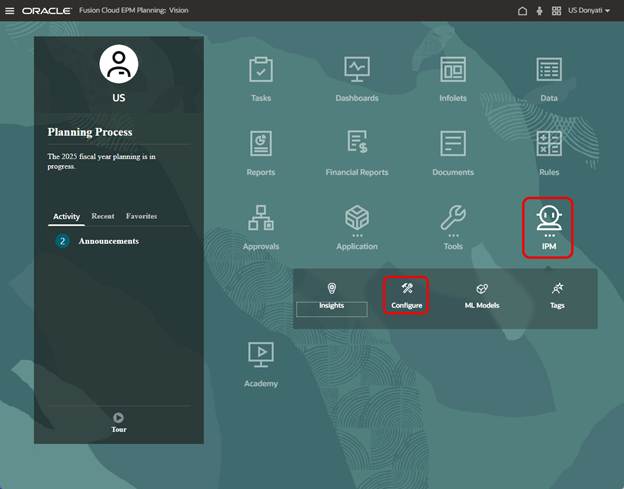
Now we can go to IPM Configure.
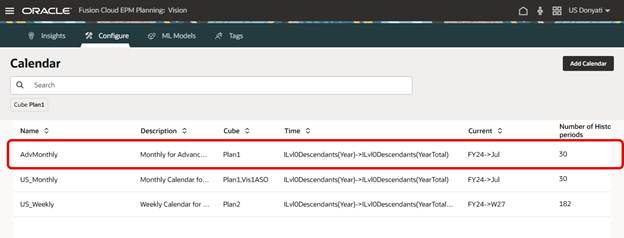
Advanced Predictions require a Calendar to be used. In our sample application, we have a couple of calendars already created, but we decided to create a new one specifically for this testing.
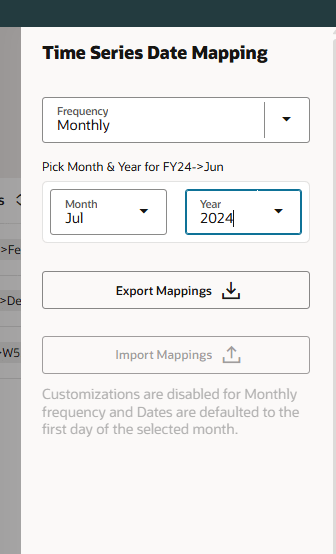
After saving the initial settings, the Date Mapping needs to be updated. Date Mapping defines the frequency and date format for the predictions and is required for preprocessing and ML model training. Set the frequency and the date for the first prediction period.
Once the Calendar is created, we can create the Advanced Prediction.

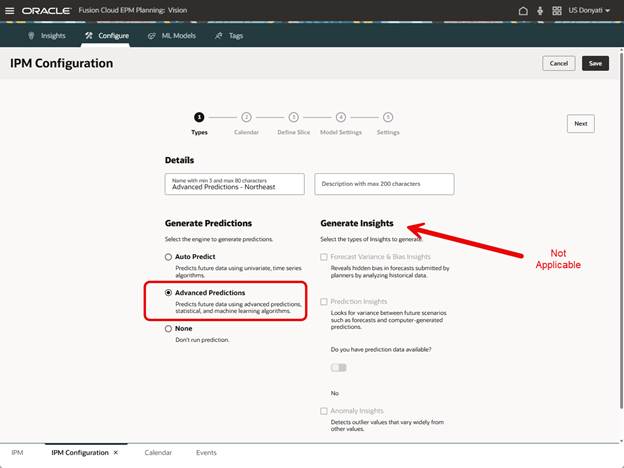
The Types page has the option for Advanced Predictions. When selected, notice that the Insights options are not available. This is different than when standard Auto Predict is selected.
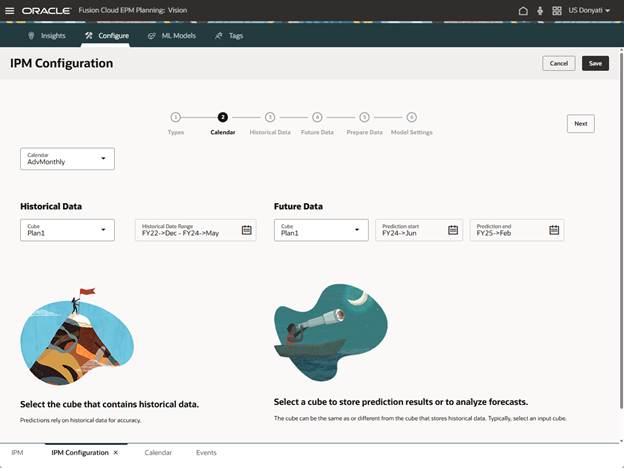
The Calendar page does not have any formatting changes; the setup is the same as standard Auto Predict. Select the Calendar, we will use the one created for this testing.
The Historical Data page is where we see the impact of selecting Advanced Predictions.
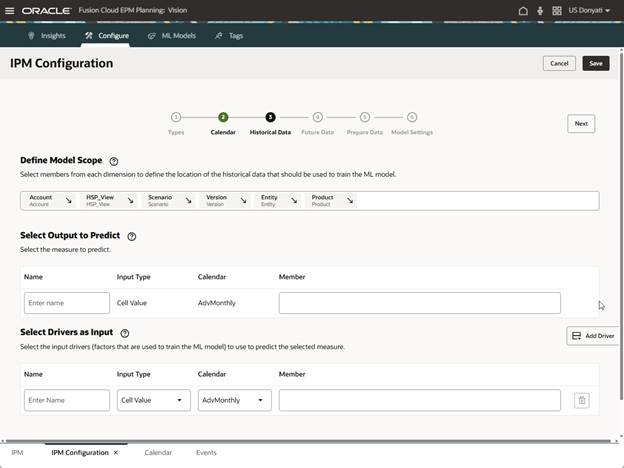
Let’s break this down into manageable chunks. Define Model Scope determines the measure you want to predict and the location of the historical data to train the ML model. Click the arrow for the dimension to be predicted and it moves to the Select Output to Predict section.


For the historical data, click each dimension in the Define Model Scope section and select the members. The selections are the same as you would do in a regular Auto Predict for history.

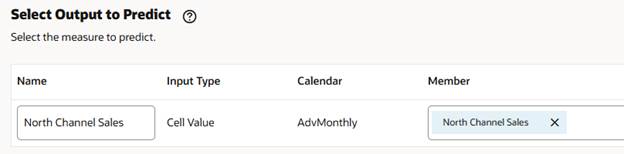
In the section Select Output to Predict, select the members for the dimension. We will keep it simple for testing and only select one account member. The name prepopulated based on the member selection.
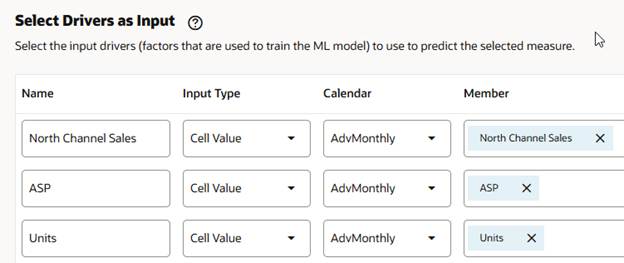
Next is Select Drivers as Input. This is what separates Advanced Predictions from standard predictions. The multiple drivers selected are going to impact the value of the prediction, meaning that the better the drivers, the better the prediction. You want to use drivers that make sense and have a correlation to the measure being predicted. In our example, average sales price and units do have a correlation to North Channel Sales, so they make sense as drivers. Note: There is the ability to select a different calendar, this can be used if you have a driver from a different cube or other variations where the needed data is not in the main calendar definitions.
Uh oh. When we clicked Next, we got an error message. Apparently, we cannot have the same name for output and input members.

The name field prepopulated with the member name selected in output and driver input. We have to change one of them so the settings can be saved and move on to the next step.

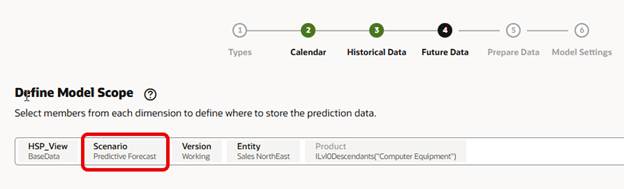
Moving on to the Future Data page, it looks the same as the Historical Data page, it carries over the selections made there. We need to change Scenario so our prediction is saved to the proper members. No other changes are needed here.
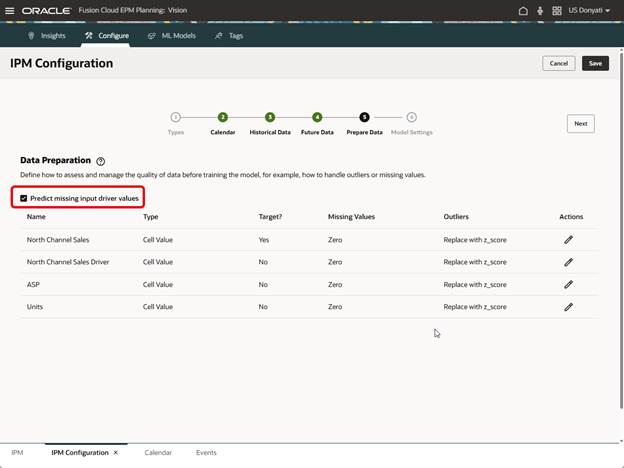
The next page is Prepare Data. The only item we are going to change here is to select Predict Missing Input Driver Values. We are enabling this so the prediction will still happen even if there are missing values in the drivers.
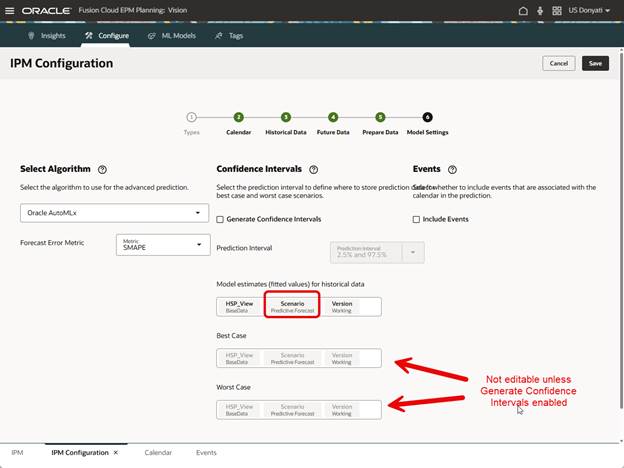
The last page in configuration is Model Settings. There are several algorithms to choose from. The algorithm Oracle AutoMLx is a proprietary set of ten algorithms and will automatically select the best model for the prediction. The other algorithm options available are Light GBM, XGBoost, Prophet, and SARIMAX. We will use the Oracle AutoMLx algorithm.
The Forecast Error Metric defines how the selected algorithm optimizes the model training. The ML engine learns the patterns from the data and looks for the best option to minimize errors. We will use SMAPE (Symmetric Mean Absolute Percentage Error).
Confidence Intervals settings are interesting, and by “interesting” I mean it confused me a bit. If you enable Generate Confidence Intervals, Advanced Predictions will calculate additional scenarios for best case and worst case. In Auto Predict I often use versions for best and worst case, and in this sample application I do not have other scenarios created for this purpose. For this test run we will not enable Generate Confidence Intervals but may come back later after creating more scenarios and try again.
We do need to select where the model estimates prediction data will be stored, the default prepopulates with Actual, which does not make sense, and the configuration will not save with that as the selection. We changed it to Predictive Forecast. Also note that Best Case and Worst Case are not editable since we did not enable Generate Confidence Intervals. Events can be included, just like in Auto Predict, but we do not have any to use in this test.
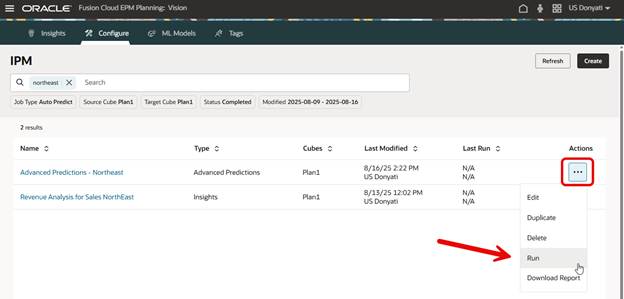
Let’s run it and see what happens.
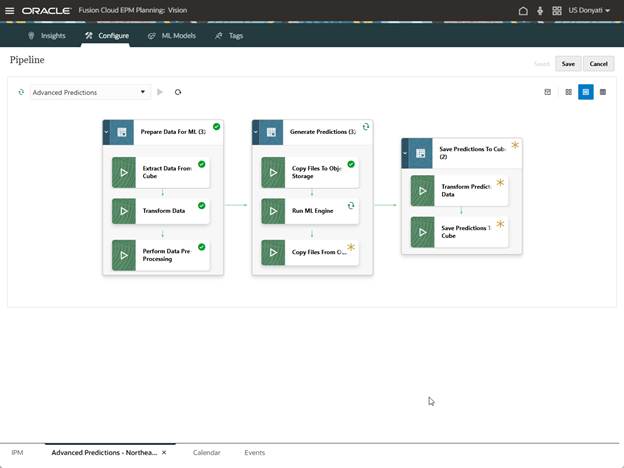
It may take a while to complete. Behind the scenes several things are happening. When we created this Advanced Prediction, a Pipeline was generated. Stages to prepare the data for ML, generate predictions, and save predictions were created. The data is getting processed on Oracle AI servers and the results fed back to our application. We can track the status of the Pipeline for this prediction as it is running.
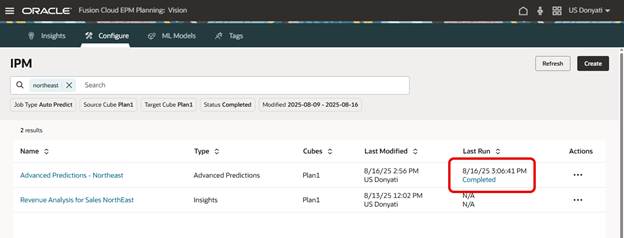
Success!
We created a form to review the prediction.

It will take some additional analysis to compare this Advanced Prediction with traditional predictions, but at first glance it looks reasonable. There is a bit of a learning curve in configuring Advanced Predictions, and I had a few failures during testing (i.e. unsure what to select in Confidence Intervals, a wrong Calendar parameter). I still need to go back and test generating best and worst cases, and larger data sets with other drivers. Overall, this is a substantial improvement in EPM predictive forecasting, and we should definitely be taking advantage of it. I encourage you to read through the Oracle documentation for more details and guidance.
As always, happy EPM’ng!

One thought on “Advanced Predictions in EPM Planning: A First Look”