
Task Manager has been available in Planning for a while now, but until recently I have not had the opportunity to do much with it. Oracle documentation is extensive and can be overwhelming. For starters, I am going to show the initial setting up of a task list and adding a task.
We begin by opening Task Manager from Navigator.

Before making a list of tasks, a template needs to be created. Click the + icon to create a new template.

Name the template and update the Number of Days fields as needed.
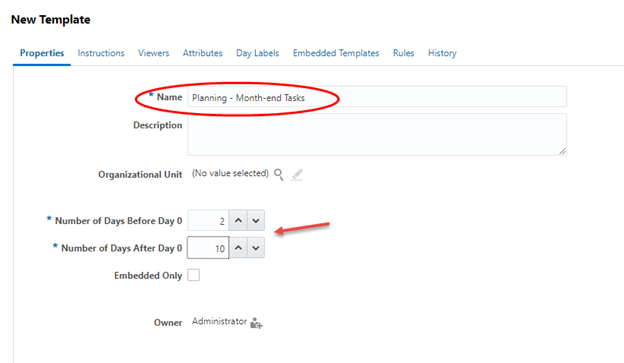
On the tab Day Labels, you can change the labels for each day if desired. I left mine with the default names.

I did not make changes to any other tabs. Click OK when done.
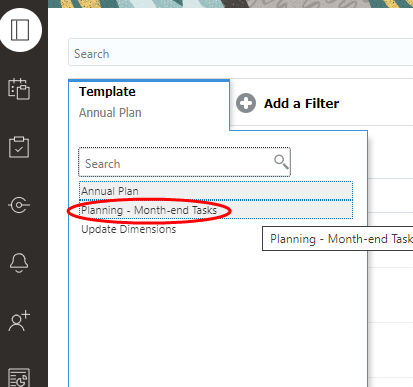
Once the template is created, tasks can now be added to it by clicking on the Tasks tab at the bottom.

Select the template from the drop-down menu.
Use the + icon to add tasks.
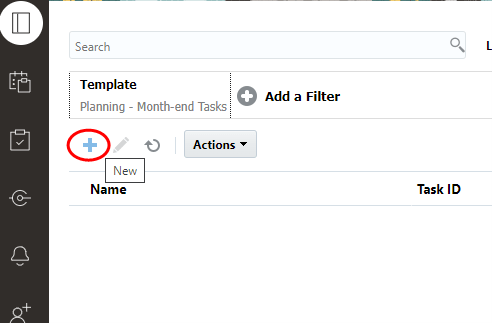
There are different types of tasks to add, the most simple being Basic Task. A Basic Task can have instructions, be assigned to users in the workflow, and have predecessors.

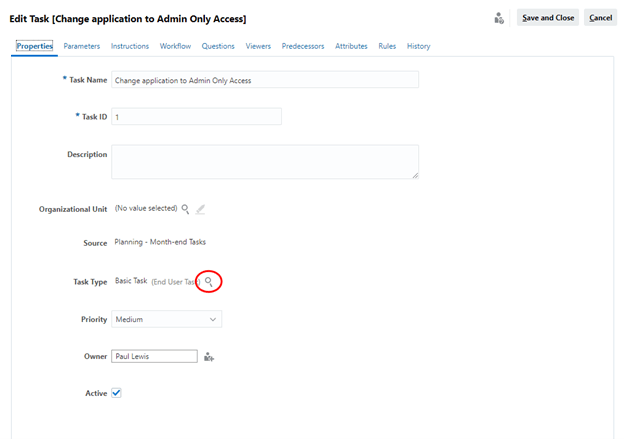
While Basic Task is, well, basic, there are many others that are more robust. From the Properties tab of the task, click the selection icon to bring up the available types.
Expanding the Planning and Budgeting item shows the different Task Types.

- Basic Task is the simplest.
- Configure Application has a red icon (unsure what it is supposed to be) that designates it as a non-automated task. This one will open the configure page.
- Enter Form Data will open the selected data form.
Notice the green gear icon on some tasks. This designates it as a task that can be automated. Automated tasks execute once their predecessor task is completed.
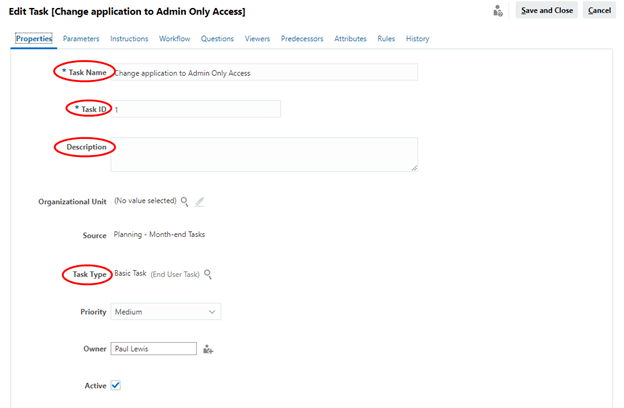
Back to configuring our Basic Task. In the Task window, the toolbar header shows all the settings to consider. We will list out definitions for each of the settings, but most are not relevant to our sample of setting up a Basic Task.

- Properties is where you set the task name, ID, description, and the type of task. For Task ID, I like to use a numbering system to help keep the list organized.
2. Parameters can be set for certain Task Types, like opening a form or running a business rule. Basic Tasks do not have Parameters
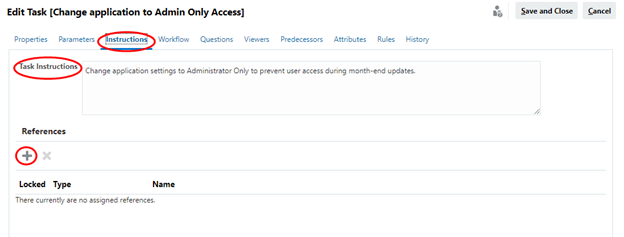
3. Instructions are where you can enter information needed for the task. References to other documentation can also be input, either attaching a local file or a URL.
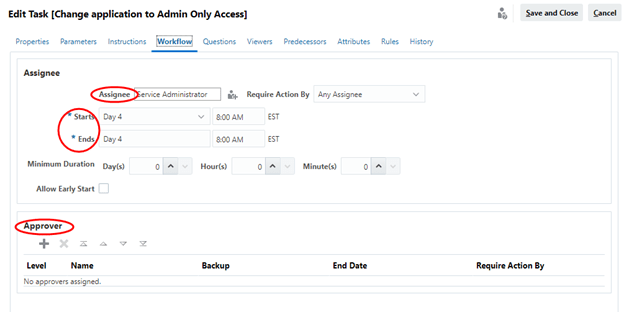
4. Workflow settings determine the assignee, start and end times, and whether there is an approver.
5. Questions can be input and enabled as required to be answered for the task to be completed.

6. Viewers can be added to view the task.

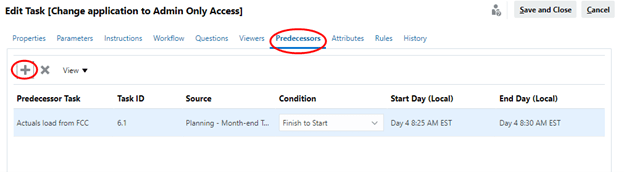
7. Predecessors can be assigned such that the current task can not be worked on until the predecessor is completed. Be careful in assigning predecessors, the current task should be after the predecessor in the start/end time settings.
8. Attributes can be assigned that will allow filtering of tasks by attribute. Attributes need to be set up in Task Types before they can be assigned to a task.
9. Rules can be set up that apply to all tasks of the same Task Type. For example, a rule can be established that for an Auto Submit Task, certain conditions must be met first.
10. History is a record of changes made to the task.

That’s the general process for adding tasks. Once all the tasks are added to the template, other configuration is needed before the task list can be used. We’re going to save those next steps for another post (or more) since this one has already become longer than I like.
As always, happy EPM’ng.

Hi, i am waiting for the next detailed blog and if possible please make video on the same.
LikeLike