
As a follow-up to my post about adding tasks in Task Manager, the next step is to create a schedule so the task list is available to users.
Once all the tasks are added to the template, a schedule can be created. Per Oracle, a schedule “defines a chronologically ordered set of tasks that must be executed for a specific business process, and is the application of a template into the calendar”. In other words, the schedule assigns the task list to the calendar dates to be utilized.
From the Templates tab, click the ellipses for the task list and select Create Schedule.


- Name the Schedule
- Select Year
- Select Period
- Select Day Zero Date. The Date Map is populated based on the Day Zero selection and uses the Day assigned to each task in the list.
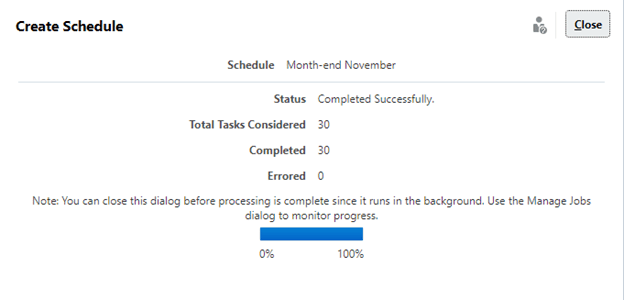
We are keeping this basic at this point, so nothing needs to be configured for Predecessor Task Links or Override Parameters. Click Create Schedule to save the schedule.
After creating a schedule, go to the second icon on the vertical menu.
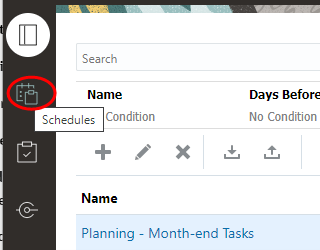
Open the schedule just created.

The window opens with the Properties tab displayed.
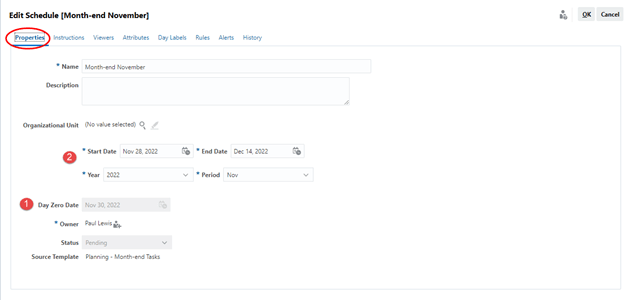
- The Day Zero Date is filled in from the schedule creation and is read-only
- The Start, End, Year, and Period fields are also filled in from the schedule creation, but they can be edited here if necessary
Instructions can be added to the schedule, including references to documents or URLs.

Additional settings can be configured on each of the other tabs, but for our purposes of setting up a simple task list, we are not going to go through all those details at this time.
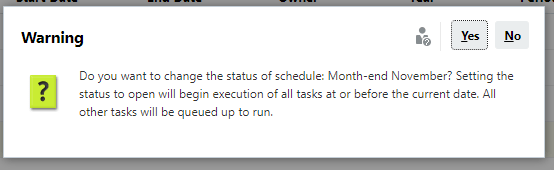
With a schedule created, one more action is needed to make the task list active. From the Schedules page, click on the ellipses for the task, select Set Status, and then Open.

A confirmation window opens, click Yes.
The schedule is now open.


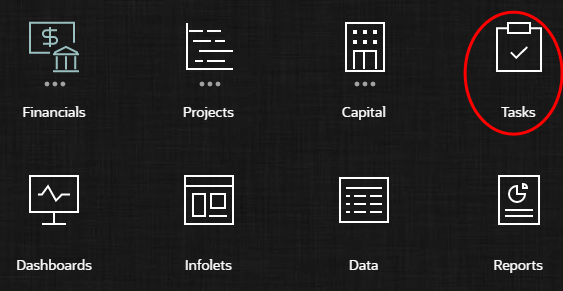
With the schedule open, the task list on that schedule is now available to users. Return to the home page and select the Tasks card.
The first page to open is the Worklist. We can open the first task in the list from here.
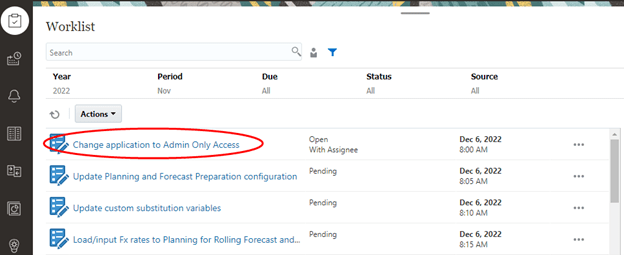
Or we can go to the second vertical icon Tasks and open it from here.

- Task ID is displayed
- The Status is displayed, hovering over the icon will state whether the status is open or pending
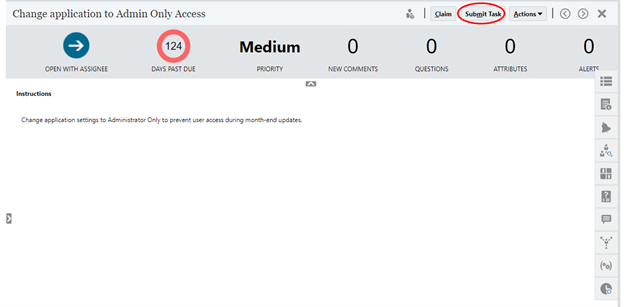
Since this is a basic task, all we see upon opening is the Instructions. In this case, the instructions are for the application settings to be changed to Admin Only. You will need to exit from Tasks and go to Settings to change the application to Admin Only, then return to Tasks and reopen the task. To complete the task, click the Submit Task button.
A confirmation window opens, click Yes.
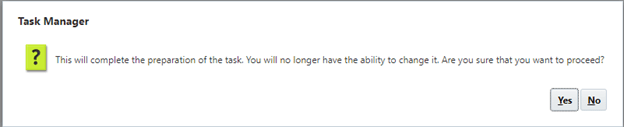
The Task is completed.

We can either move on immediately to the next task or return to the list.
- Move to the next task
- Return to the list
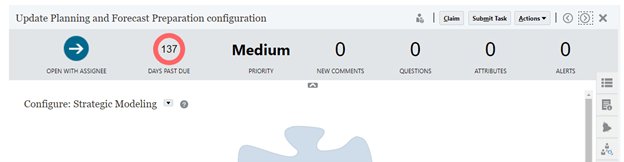
Moving immediately to the next task displays that task. In our list, the next task is to Update Planning and Forecast Configuration. Since this is not a basic task, we can change these settings from within Tasks, there’s no need to exit out and open elsewhere.
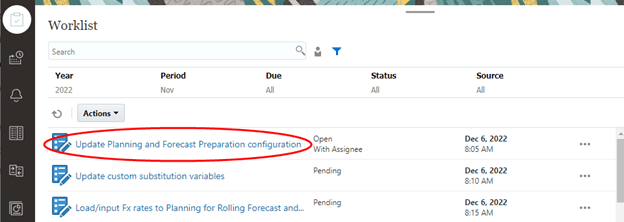
If we instead choose to return to the list, we see that the first task is Closed and the second task is Open.


Remember that when we opened the first task, we did so from the Schedule Tasks screen. If we had done so from the Worklist and then returned after completing the task, the first task is no longer in the list and the next task shows as Open.
I prefer going through tasks from Schedule Tasks, but both ways work.
To show another example of a non-basic task, I’ll skip to the fourth task. I didn’t really skip anything, I had to complete each of the predecessors to the fourth task, then that one opened.
This task takes us directly to the Fx rate form. Similar to the Update Planning and Forecast Configuration task, we can access this form from within Tasks, there’s no need to exit out and open elsewhere.

And so it goes for each task opened. Once completed and submitted, the task is updated to Closed and the next one is Open.
Between this post and the previous one on adding tasks, you should have enough information to get started. Task Manager has a tremendous amount of functionality, but it will take some time for me to get through it all. I’ll continue to write about my experiences, so please check back every now and again.
As always, happy EPM’ng!

I create the task list, the schedule but I’m not able to see the Forms/Dashbords in the task list, also the submit task menu is not there for any of the tasks
LikeLike
Did you set the status of the schedule to Open?
LikeLike
Yes, I schedule to open
I will open a SR to review the error
Thanks
LikeLike
I’ve set up a task type “enter form data” which has been set up to select a specific end user data input web form.
In task manager, I’ve set up a template, schedule (open status) and related tasks. I’d like to end user to be able to click on a link within their task manager/ open task that takes them directly to the web form. Right now all they can see is the name of the form, which is greyed out (so they can’t click on it to go to the webform). Is it possible to get a hyperlink to the web forms and if so, how?
LikeLike
When you set up the task type, did you select the form to open from the tab “Selected Item: Parameters”? This should assign the form to the task. If the user is not seeing the form, and you did assign it, check security that they have access to the form.
LikeLike