Back in August 2023 I mentioned functionality called Calendars and Events. I did not get into specifics at that time, I was instead writing about configuration changes as a result of the new functionality. Now it’s time to get into Calendars and Events, which is really cool.
Calendars and Events is functionality used to enhance IPM Insights, Auto Predict, and Predictive Planning. Oracle has good documentation on it. In simple terms, it smooths out inconsistent historical data so Insights and predictions are more accurate. Use cases include businesses with recurring events that cause a spike (or dip) in revenue/expenses, or one-time events like hurricanes that cause a change in the data.
Before we can configure Calendar and Events, we need to prepare some historical data for testing. We set up a sample Vision EPM Planning application that includes sample data for from January 2020 through June 2022.
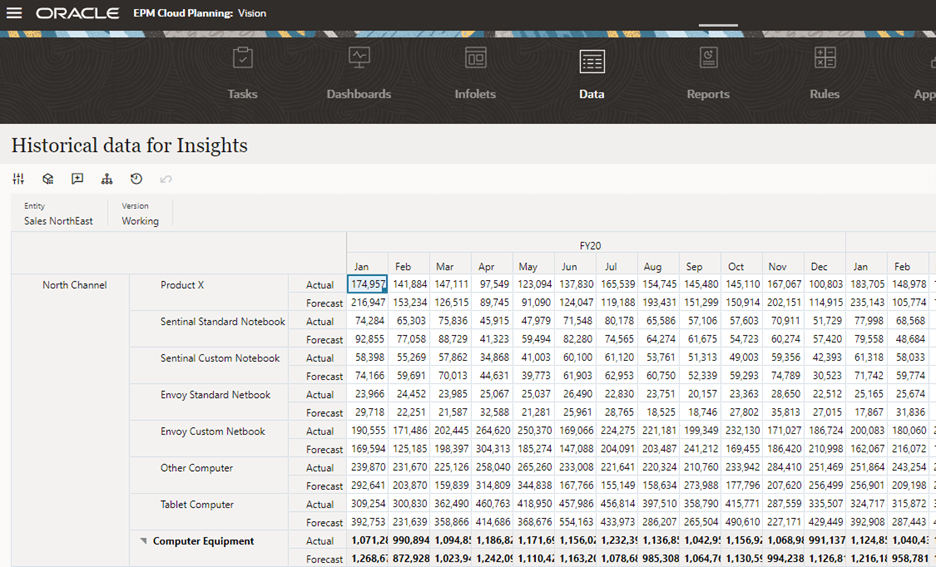
We changed the actuals data for product volume North Channel in Apr, May, and Jun of 2020 to reflect a change in units due to an unexpected chip shortage.

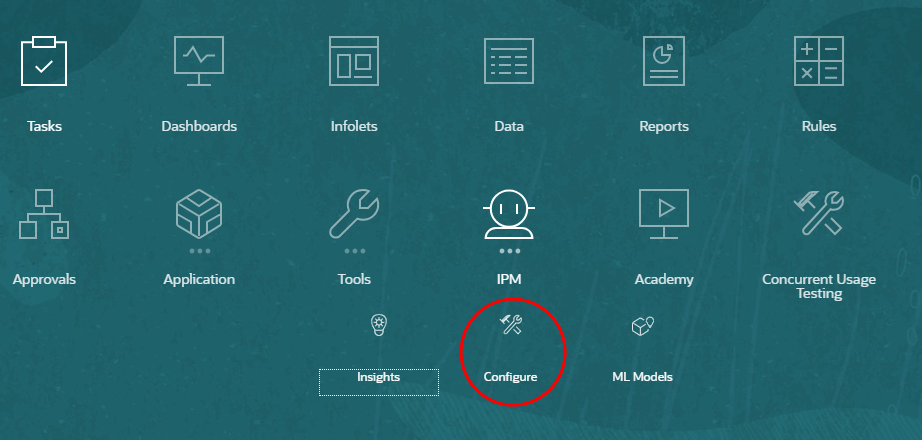
With the sample data set up, we can now create a Calendar to define the scope and range of the time series of data. We want a Calendar specific to the North Channel data. From the home page, click IPM and select Configure.
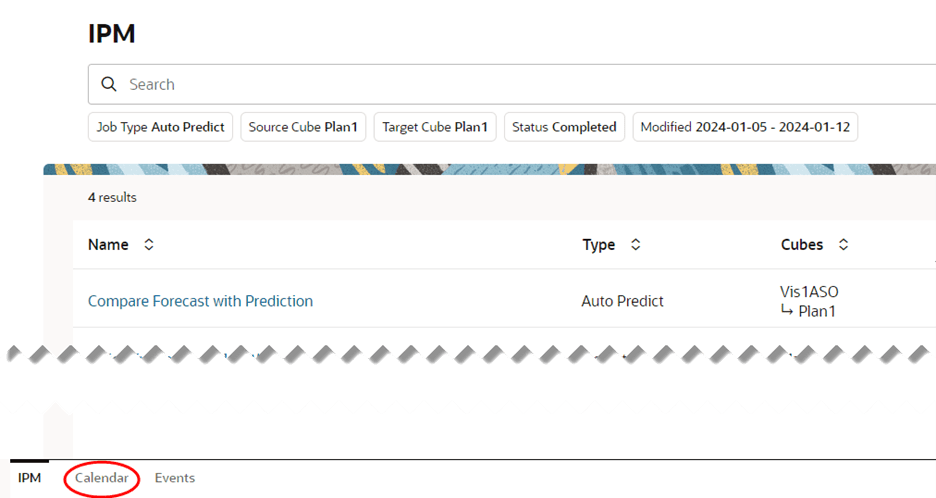
Select Calendar from the bottom tabs.
Select Add Calendar from the top right.

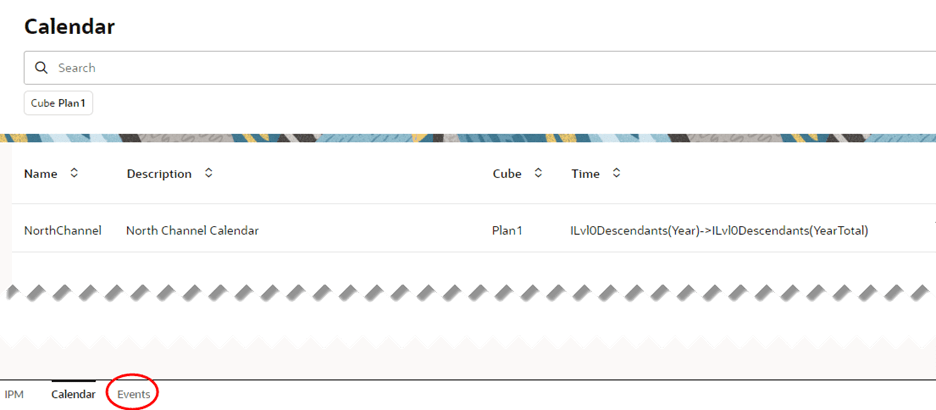
- Enter a name for the Calendar. In our example, the Calendar is specific to North Channel so the name should reflect that.
- Enter a description to further clarify what the Calendar applies to.
- Select the source of the data.
- Select the time (year and period) for the start of the Calendar. Documentation is unclear on this, but if you use ILvl0Descendants(Year) and ILvl0Descendants(YearTotal) the start of the Calendar will be determined by the number of historical periods to include and the selection for start of prediction period.
- In the current column select the start of the prediction period. You could hard code the value, but using a substitution variable is better.
- Enter the number of historical periods to include.
- Enter the number of prediction periods.
- Click the checkmark icon to save the Calendar.

With the Calendar created we can now configure an Event to manage the drop in North Channel volume due to the chip shortage. There are three types of Events. Per Oracle documentation:
- One-off—An event you don’t expect to be repeated, but you want to include it in your data.
- Repeat—An event that is regularly repeated, where increases or decreases will also be repeated. For example, holidays such as Diwali or Thanksgiving are repeating events.
- Skip—Similar to a one-off Event, it’s an event you don’t expect to be repeated, however, you don’t want to include it in your data. Data for Skip Events is removed from the series.
For our example, we will use One-off. Go to the Events tab.
Select Add Event from the top right.
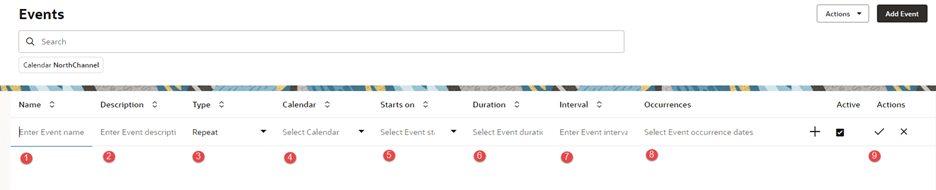
- Enter Event name. In our example, the Event is specific to a chip shortage affecting North Channel.
- Enter a description to further clarify the Event.
- Select the type of Event. We want to One-off for our example.
- Select the Calendar to use for the Event. We only have one configured at this time, but multiple Calendars could be available.
- Select the start of the Event, Apr in our example.
- Select how long the Event lasts, which is 3 to include Apr, May, and Jun.
- Interval is not applicable to One-off or Skip Events. For Repeating Events, the interval determines how often the Event repeats.
- Occurrence is not applicable to One-off or Skip Events.
- Click the checkmark icon to save the Event.

Events can also be imported and exported, refer to Oracle documentation for more information. After successfully creating a Calendar and an Event, we can configure an IPM Insight or Auto Prediction to use the Calendar and Event. Select IPM from the tabs at the bottom.

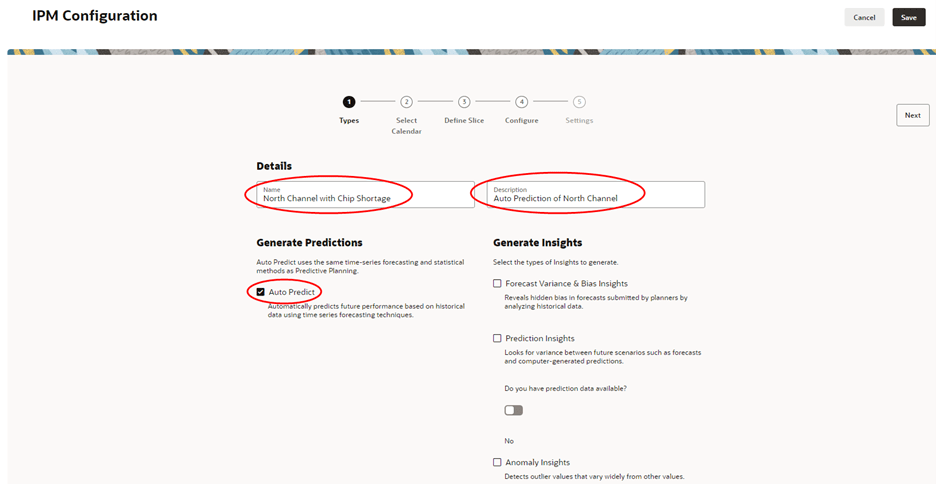
We could modify an existing Insight or Auto Prediction, duplicate an existing one, or create a new one. For our example, we will create a new Auto Prediction. Click Create from the top right. Enter a name and description. Auto Predict will default to enabled. We could also enable Insights, but we’ll save that for another time.
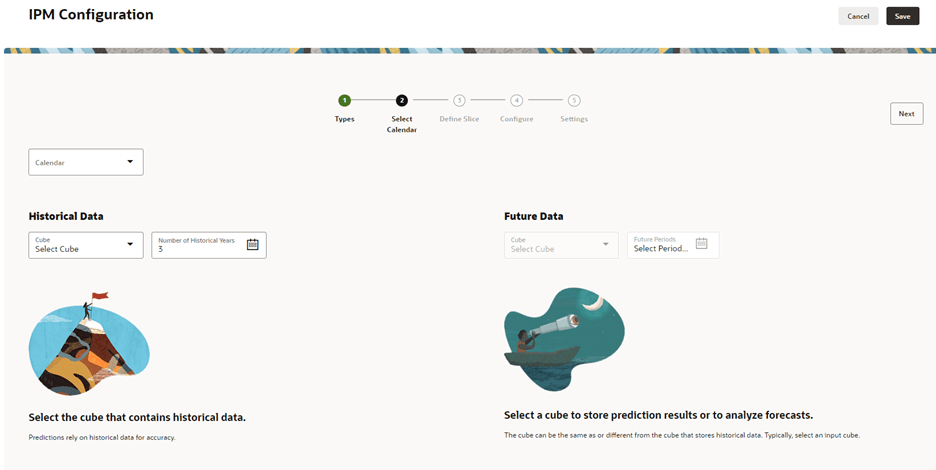
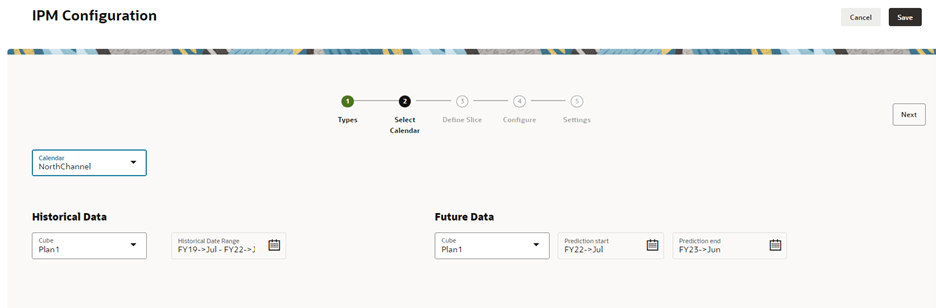
Click Next. The Select Calendar page is for selecting the Calendar and selecting historical and future data parameters.
Since the Calendar defines the ranges for historical and future data, those fields are automatically populated when the Calendar is selected.
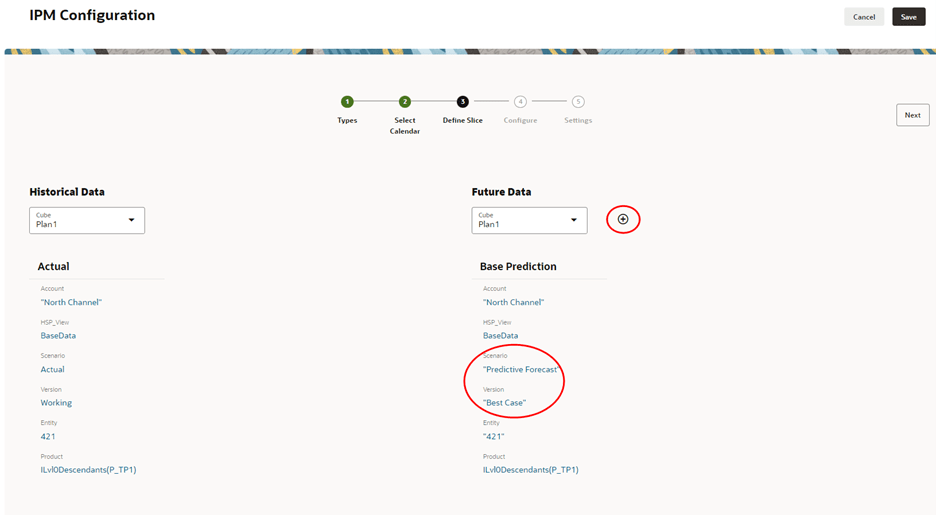
Click Next. The Define Slice page is for defining the specific members to include in historical data and where to place the prediction data.
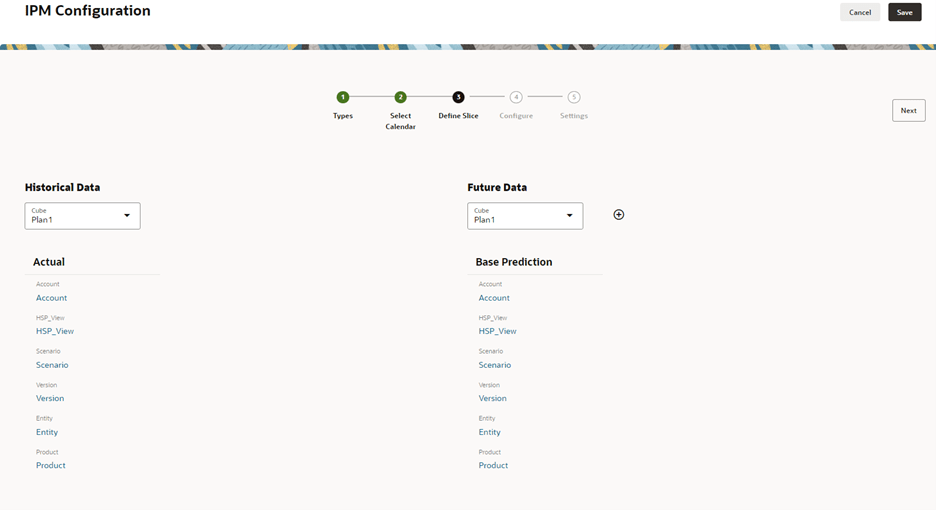
When we select the specific members for the historical data, the future data members are prepopulated with the same values. We changed the target Scenario and Version since we do not want to have future forecasted data in the Actual scenario. We could also add two more versions to the target (worse case, most likely). This is done by clicking the + icon next to Future Data.
Click Next. The Configure page contains many parameters that can be set depending on what was selected on the first page. We only selected Auto Predict, so the choices will be specific to that. We need to enable Events to include in the prediction. We could also Show Advance Options which gives us the ability to fine tune the statistical parameters for the prediction.
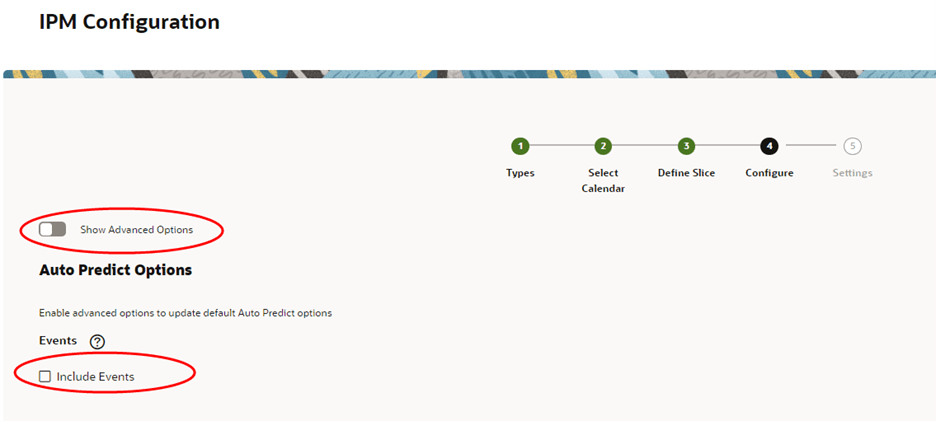
We will leave the default parameters set for that and only enable Events.

Click Save.

The Auto Prediction is available to run. Click the ellipsis and select Run. Depending on the amount of data being processed, run time could take several minutes.
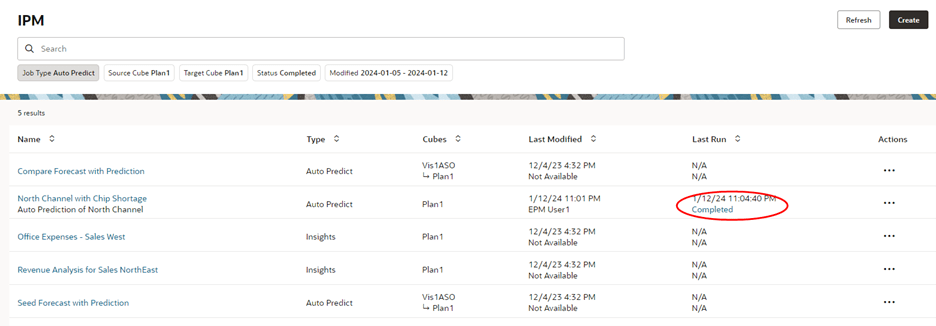
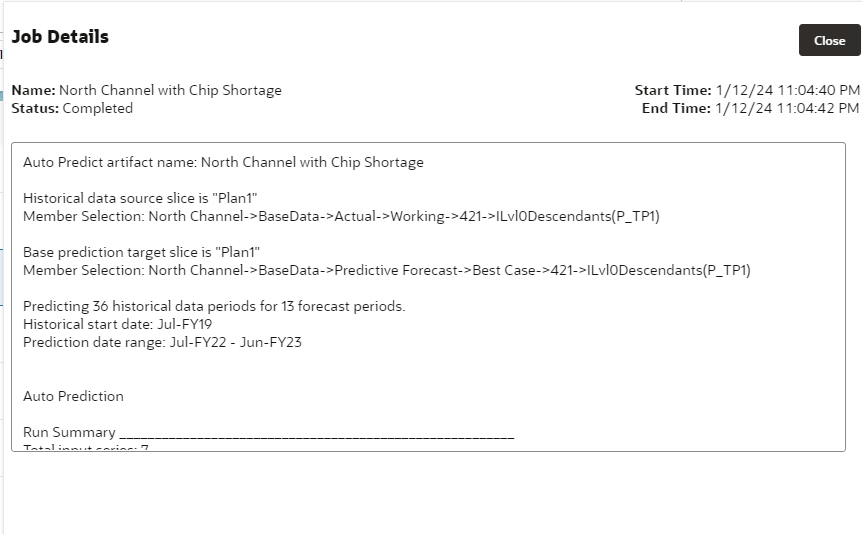
Clicking the link on Complete will show details of the prediction. The report can also be downloaded from the ellipsis menu or the Job Console.
So how do we know if including the Event in the prediction had any impact on the results? To test that question, we created a copy of the Auto Predict and did not include Events. Everything else was configured the same way. We selected a different target Version so we can compare it with the first prediction.
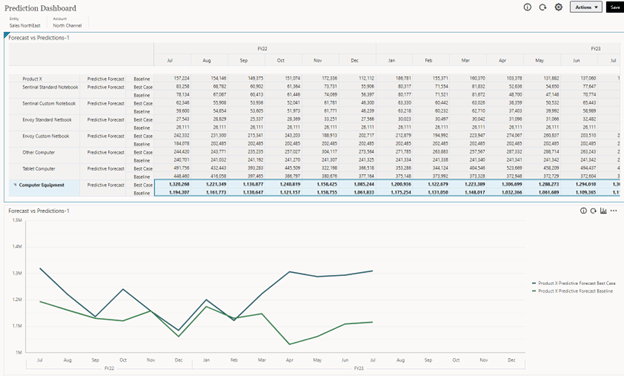
The prediction with the Event is Best Case (blue top line) and the prediction not including the Event is Baseline (green bottom line). We can see a difference in the data starting in Apr.
This was a simple example to show the basics of creating Calendars and Events. I suggest reviewing Oracle documentation and videos for more detailed information. I’m excited to start using this in my implementations, before this functionality was available we had to get creative in how to resolve inconsistencies in historical data (here’s one way we did it). Calendars and Events provide a much better solution to the problem.
As always, happy EPM’ng!

Paul, what a great, detailed article! You are a great advocate for EPM!Do you know if this functionality works for the old school EPBCS licenses?
LikeLike
Hi Steve, thanks for the kind words. That’s a really good question. I am not sure if Calendars and Events is available under the old EPBCS license, I looked through some Oracle documentation but could not find anything specific. Sorry that I don’t have an answer, but I will keep checking and ask some of my colleagues.
LikeLike